Showing posts with label how to. Show all posts

Wednesday, 9 March 2016

Getting ready for the A to Z Blog Challenge


As motivation to get back into the whole blogging regularly thing, I've decided to participate in The A to Z Blog Challenge again. I'm not sure if that's a good thing or not - I did get serious blogging burn-out after April last year.  But it was fun and I want to do it again!

For those of you who don't know, the A to Z challenge is where you post each day in April (except Sundays), working your way through the alphabet.  Some people blog on a theme, some people just post randomly.  It's a lot of fun and a great way to discover new blogs.  It's how I met a lot of you. The host blog page has a lot of useful information about the challenge, how to sign up, a list of people who have signed up, and lots of information to get you ready or decide if it is right for you.

My favourite blogs last year, and the ones I'm looking forward to finding again this year, are the people who cross stitch from A-Z (particularly those who were/are stitching my patterns!).  I'm going to be joining them again this year - just making the final decision/s on which alphabet/s to stitch.

Now is a good time to start planning if you are thinking of cross stitching your way through the A to Z Challenge.  You'll need time to get your supplies ready, rule up your fabric, stitch any boards/backgrounds/fancy bits, and of course choose your pattern!  Depending on the pattern you choose, you may also want to get a head-start stitching the letters so you are not stitching until midnight to try and make the deadline!

Alphabet patterns available from Fangirl Stitches
There are a lot of great A to Z cross stitch patterns out there.  A search on Google or Etsy will turn up thousands of different ones in various themes, colours, styles, and degrees of difficulty.  It can be a good place to start though and help stimulate the thinking process while you choose a theme or style.

I'm biased of course and think the ones in my shop are pretty fantastic ;)  To make things easier for people getting ready for the challenge, I've added an extra search category, and now you can find all the alphabet patterns in one handy location.

Alphabet cross stitch patterns available from Fangirl Stitches.  Can you name them all?
 I'm going to be sharing as I get ready for the A-Z challenge, although I'll leave the "big reveal" until the actual Theme Reveal date (21st March).  If you've got any tips or suggestions for stitching your way through the challenge, I'd love to hear them.

Alphabet cross stitch patterns available from Fangirl Stitches
Are you stitching for the A to Z Blog Challenge?  Leave a comment below and I'll drop by your blog to say hello and add you to my "to follow" list.

Are you stitching a Fangirl Stitches pattern?  Let me know that too - I love watching people work on my designs!

Happy stitching!

Sunday, 31 May 2015

How To... Make Biscornu

I've been having fun making biscornu this week and want you all to share the fun so I've made this handy guide.  Have fun!


1. Stitch the two halves of the biscornu - make sure the two squares are exactly the same size.

Don't forget the backstitch line around the boarder - this is really important for joining the two halves together.

2. Trim the two halves, leaving a 1/8" boarder - I found a 3 square boarder worked well.

3. Fold down all edges.  Make sure you create a sharp crease - this will make your job easier.

Depending on your design you may also want to fold one side in half in order to find the middle of the edge for the next step.  The lines on the back half of mine made this step easy.

4. Use two strands of the same coloured thread as the backstitch line.  Tie a knot in the strands (the only time I ever recommending using knots!) and push it through a corner of one side of the biscornu.  Then push the needle through the middle of the edge of the other half.  Use the picture as a guide.

Bring the needle back to the front of the biscornu by coming out one square below.

5. Bring the two edges together and line up your back stitch lines.  Thread the needle through the back stitch lines, working your way along the edge

6. Watch your corners - if you just keep taking it one backstitch line at a time you will be fine.  Eventually your biscornu pillow will start taking shape, turning into an 8 sided square.

7. Leave yourself an opening - I left one side (or two half sides) open

8. Stuff your biscornu with wadding.  I find the stuffing from a cheap pillow works really well.

Then finish stitching the edges together.

9. At this point there are two different ways to go, depending on how long the remainder of your thread is.  If your thread is pretty short, thread the needle back along your seam tos ecure it before cutting off any left over bits.

With a new double thread, push your needle in through the seam and then out through the centre of the cushion - this is to attach the button (as per step 10)

10. If your thread is still long enough after finishing the seam, push your needle into the finished pillow and bring it up through the centre of the piece.

Attach a button to either side of the pillow by pushing your thread from one side to the other.  Do this several times to ensure it is secure.

If you are making a pincushion, end by bringing your needle back out through a seam before trimming the thread.

11.  To make your biscornu into a hanging decoration, bring your needle back out through one of the corners of the biscornu, and then tie the ends of the threads together to create a hanging point.


There are lots of biscornu patterns available on pinterest, Esty and other on-line locations (I've seen some Doctor Who ones with weeping angels).  I'm also working on some patterns for my Etsy store (I'll keep you posted!).  In the mean-time you could always try my very basic pattern to get you started.

Happy stitching!

Wednesday, 4 February 2015

How To Cross Stitch - The French Knot

One of the the most hated stitches in cross stitch is the French knot.  More so than back stitch, it's one of those things you either tolerate or hate.  But I've been over that before in my Beads vs French knot post.

Sometimes though, there's no escaping it.  Usually because I don't have the right coloured bead.  Plus, I'm very biased and there are plenty of people who like the french knot.  It has a flower-like appearance and can be very effective, particularly in landscape scenes.  

Honestly, it's not that complicated a knot - I just find it rather fiddly.

The French Knot

1. Come up through the whole, and pull your thread through (taking care not to pull it out completely!)

2.  Wrap the thread around the needle twice.  Some patterns call for the thread to be wrapped more or less times, twice seems to be the most common in my experience.

3.  Push the needle back into the same hole you came up out of.  To make your knot more secure, you may want to come down one fibre over so the thread doesn't pull through.  

4. Hold the thread taut, and push the needle all the way through.

5.  Carefully pull the rest of the thread through the knot.  Don't pull too hard or you will pull it all the way through.

6.  Your finished knot should look something like this.

Some patterns call for you to use only one strand to make your French Knot.  In that instance, I tend to wrap the thread three times around the needle to make the knot fuller.

The appearance of a French knot changes quite significantly whether you are stitching it with one or two strands, and how many times you wrap your thread around the needle
Wrapping once, twice, three and four times, using
two strands of thread
Have a go and let me know how you find French Knots.

Happy Stitching!

Sunday, 1 February 2015

How To Cross Stitch - the 3/4 Stitch

The Ultimate Cross Stitch Guide, Post 4 is on the 3/4 Stitch.  Along with the cross, and backstitch, this is one of the main three stitches used in cross stitch.  It is easier to stitch on evenweave than aida as evenweave gives you a hole in the middle of the cross.  Stitching on aida, you have to push your needle through the tightly woven square which takes a little more effort and concentration to get precise, but is still relatively easy.  It makes a nice step up for the beginner stitcher so they can try some more complex patterns. In my opinion the 3/4 stitch also adds more shape and definition to cross stitch patterns.

The 3/4 stitch is 3/4s of a cross.  It can sit anywhere on the square - top left, bottom left, top right, bottom right - and its position alters how you stitch it.

Bottom Left 3/4 Stitch


Come up at the bottom left corner of the square at point 1

Push the needle down through the middle of the square at point 2.   

Come up at the bottom right corner of the square at point 3 and then down through the top left corner at point 4


Top Right 3/4 Stitch


Come up through the middle of the square  at point 1 and then down through the top right corner at point 2.  

Come up through the bottom right corner of the square at point 3 and then down through the top left corner at point 4.


Top Left 3/4 Stitch


Stitch the bottom stitch as normal - up at point 1, down at point 2.  

Then push the needle up through the middle of the square at point 3, and down through the top left corner of the square at point 4.


Bottom Right 3/4 Stitch


Stitch the bottom stitch as normal - up at point 1, down at point 2.  

Come up at the bottom right corner of the square at point 3 and finally down through the middle of the square at point 4.


Always remember the golden rule of cross stitch - keep your top stitches pointing the same way.  This will make your finished piece look a lot neater.

Adding the last 1/4

Quite often you will need to add the other 1/4 of the cross in a second colour.  You can either do this by adding the last 1/4 using the method above, or by adapting it slightly to add more dimension.


Option 1 - adding dimension
First, decide which of the two colours is meant to sit in front.  Is one colour more background?  Or is it hair that should sit in front of or behind the face?  

Once you have decided, stitch the foreground 3/4 using the method described above.  With the background colour, you are only going to stitch 1/4.  It is easiest to bring your needle up from the empty corner and then down through the middle hole created by the previous colour (as with the green thread in images one and two).  Where the 1/4 stitch is part of the bottom stitch (image two), make sure to push it under the top half of the stitch.

Option 2 - the same stitch
For this stitch, complete in the same method as detailed above, and shown in images three and four above.

The main difference for me is in the final presentation -  option 1 adds less bulk to the square, particularly if there is also going to be a backstitch separating the colours. As always however, the choice is entirely up to you.

The stitches on the right have been stitched using option 1
The stitches on the left have been stitched using option 2.

Happy Stitching!


Wednesday, 28 January 2015

How To Cross Stitch - The Backstitch

The Ultimate How To Cross Stitch Guide - Post 4 is about the backstitch.


The Backstitch

Backstitch is the outlining.  It adds definition to your stitching, gives shape, and can draw attention to particular aspects.  Some people hate backstitch or find it tedious, but I enjoy it - I love seeing a project tie together and those weird vague shapes get a form and function.  Backstitch is also the easiest stitch - it's just creating lines.
The difference backstitch makes to a picture
The design is from World of Cross Stitch magazine
Backstitching should be left until all your other stitches are completed.  This will allow it to stand out by sitting over your other stitches.  Push your needle up at one, and then down at two.  Work your way around your design.  Backstitch lines can be straight, diagonal, or cross multiple squares.


Some designs are made up entirely of backstitch, specifically blackwork or designs featuring quotes.

This design, from the World of Cross Stitch magazine is
predominately made up of backstitch, with only a few
crosses and beads.
Coming up...

Next post will be about half-stitch, which to me is the last of the three main stitches in cross stitch.

Happy stitching!

Sunday, 25 January 2015

How to Cross Stitch - the Cross Stitch

The Ultimate How To Cross Stitch Guide - Post 3 is all about the main, nay essential stitch involved in cross stitching.

The Cross Stitch

The main stitch in cross stitch is, funnily enough, the cross stitch.  It consists of two short stitches to make up the cross.  Aida is great material to stitch on because (as you can see below) the square are already present, making it easy to make your crosses.


To stitch a cross, you position your needle behind the fabric and come up at 1, then push it down at 2. Come up again at 3, and push it down again at 4 and, voilà, you have your cross.


Usually in cross stitch, you need to make a row of stitches.  Rather than stitching each cross individually (which would be rather tedious and time consuming), you stitch a row of the bottom half, then come back along the row stitching the top half.


Then it's all just a matter of reading the pattern and counting, skipping over the blank squares or squares with other colours in them.  You may find it is helpful to use a highlighter to cross off the squares you've already stitched so you don't lose your place, particularly on larger or more complex designs.

Finishing off


To finish off your thread, weave the needle under five or six stitches to anchor it in place before cutting off the excess thread.  Alternatively, you can anchor it in place by your next five or six stitches, using the running start method from the previous post.


Coming Up...

Next post I'll show you backstitch, which is even simpler than the cross stitch.  In a future post  I'll also show you how to stitch on evenweave, which is my preferred fabric.

Happy Stitching!

Wednesday, 21 January 2015

How To Cross Stitch - Starting your thread


This is Post 2 of the Ultimate Cross Stitch How-To Guide - Securing your thread

When you begin learning how to cross stitch, one of the first things you need to know is how to start... as in how to secure your thread!  One of the biggest no-no's of cross stitch is using knots - these can cause bulges in your stitching (and make the back look ugly) and is generally frowned upon.  This is why starting cross stitch (and other hand embroidery) is very different to regular sewing.

There are two different methods to securing your thread when you start your stitching - the Running Start (also called the waste knot start) and the Loop Start.

The Loop Start


1. Separate one strand of thread

2. Fold it in half and thread the open ends through the eye of the needle

3. After stitching the first half of the first cross, turn your material over.  Push your needle through the loop at the end of your thread.

4.  Tighten the thread gently so that it looks like picture 4.  Turn your material back right-side-up and continue stitching.


The Running Start

1. Remove two strands of thread 

2. Thread them through the eye of the needle.

3. After stitching the first half of the first cross, turn your material over.  Hold the loose ends in position with your thumb.  Push your needle back through the fabric, taking care to ensure that the loose ends are trapped under the thread.

4.  Continue stitching, ensuring that the loose end is caught or 'trapped' by your crosses.  Four or five stitches should secure it in place.

This method is also sometimes known as the waste knot start as some people knot the end of their thread to help secure it under the four or five stitches, and then snip the knot off.  I have only ever done this with metallics, but each to their own.

 Loop Start or Running Start?

I prefer to use the loop start as it keeps the back of my stitching looking neater (I'm a bit of a snob like that!).  Of course, sometimes there is no choice but to use the running start: 
  • when you are using only one strand (such as backstitch)
  • when you are using left-over lengths of thread or short lengths from kits 
  • when you are using metallics and want to secure them to your needle
At the end of the day the choice is yours - use whatever you feel most comfortable with.

Coming Up....
Next post I will show you how to complete the most basic cross stitch stitch - the cross.

Happy Stitching!


Sunday, 18 January 2015

How to Cross Stitch - The Essential Materials

Cross stitching has long been my favourite hobby- I love how relaxing it is, how I can tune out the world around me, and I especially love sharing my hobby with others.   It is a very simple skill to pick up, as my 27 year old brother demonstrated last week when he stitched his first ever piece as a present for his girlfriend.
My brother's first stitching project.
Pattern is from a World Of Cross Stitch magazine
Several people have recently asked me via Etsy how difficult it is to learn how to stitch and so I thought I would put together a bit of a "how to" guide.

As I started putting this blog post together, it became bigger than Ben Hurr, so I decided to break it down into different posts.  As I write each one, I'll update the links here:
- The essential materials
- Starting Off
- The Cross Stitch
- The Back Stitch
- The Half Stitch
- The French Knot
- Beading (from last week)
- Stitching on Evenweave

This week is
The Essential Materials

The Thread

Cross stitch thread comes in bundles known as skeins.  It is a long length of thread, made up of 6 individual strands.  Most stitches require either one or two strands of thread to work the design.  Two threads gives a thicker appearance and covers the fabric better.  One strand tends to be used for backstitch.  I store my threads on bobbins to keep them organised so I can find the desired number quickly, and to stop them becoming tangled.


There are many different brands of cross stitch thread, however the main ones are DMC and Anchor.  I tend to use DMC as that is what my mother was collecting when I inherited her stash


To start stitching, unwind the desired length of thread from the skein or bobbin and cut it off.  I like to have a length about as long as my arm so that I don't have to come back for more as often.  However, shorter lengths do not become as tangled.  If you are new to cross stitch, a length approximately 20 to 30 cm is a good place to start.
The Fabric

There are many different types of cross stitch fabric around - aida, cotton evenweave, linen, zweigart linda, hardanger, crewel, plastic canvas, stitching paper... the list is endless.  They come in a multitude of colours and sizes and everyone has their own preference.  There is a great description on some of the different types of fabrics here.

The main types I use are aida and evenweave.

Aida is woven into blocks, which creates squares for you to stitch over.  Because it is so easy to see the squares, it is an ideal fabric for the beginner stitcher.  It comes in different sizes - 6, 8, 10, 12, 14, 16, 18.  These sizes relate to the number of squares per inch - the bigger the number, the smaller the squares on the fabric.

 Evenweave contains lots of strands of flax.  It tends to be more uneven than aida.  The holes in the fabric are smaller, and stitches are made over two strands or holes rather than one. Evenweave sizes (22, 24, 26, 28, 32 holes per inch) tend to be double that of aida - for example 14 count aida is approximate to 28 count evenweave.

The Needles

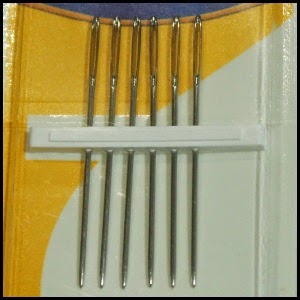
Needles used in embroidery are blunter than those used for general sewing.  Because the holes are already present in the fabric, you don't need a very sharp needle to push through.  Tapestry needles also have large eyes, which makes it easier to thread them.  Needles come in a variety of sizes depending on how thick they are.  The larger count fabric you are using (remember - smaller holes), the thinner needle you should use so you don't stretch out your fabric.  I came across a really handy guide here that discusses the correlation of needle and fabric size for cross stitching.


The Scissors


It is important to have a sharp pair of embroidery scissors when stitching.  And that they aren't used for anything other than cutting threads or fabric!  Paper will blunt your scissors pretty quickly.


The Hoop


I find it essential when stitching to use a hoop or frame.  This helps keep the fabric taught which means that your stitches are more even.  It also gives you something to hold on to rather than your fabric, reducing the stains caused by the oils in your sweat and any dirt on your fingers.

My favourite frame at the moment is the Q-Snap frame.  It comes in a range of sizes that can be joined together to create even more sizes and shapes, and doesn't squish my stitches as much as a hoop does.

The Measuring Tape


Essential for measuring out your fabric prior to using it - so that you know you have enough before you start stitching.

(Plus he's just so cute I had to include him!)


Coming up...


Over the next few weeks, I will show you some the main stitches involved in cross stitch, including the cross, the backstitch, the half stitch, and the dreaded french knot.  I'll also show you how to stitch on evenweave, which is my preferred stitching fabric.

Happy Stitching!

Tuesday, 13 January 2015

How to... Beading

Last blog post I discussed the French Knot vs Beading debate.  It seems from the comments on Facebook, Instagram and here on the blog that there are a lot of other people who would rather bead than french knot.  As promised in the previous post, I am now going to share some of my tips for using beads in cross stitch.

The Needles

A standard cross stitch needle (size 24) is too large to bead with as the beads will not pass over the eye of the needle.  Instead, I tend to use either a beading needle or a smaller cross stitch needle - size 28 or smaller.

The beading needle is a long, thin, flexible needle which makes it very useful for passing through the beads and I'm yet to find a bead too small to fit it.  However, because it is so flexible, I find it too flimsy to stitch with.  This is why I tend to use a size 28 cross stitch needle.  The eye is small enough to fit most seed beads, and is sturdy enough for backstitch so I can combine the two to save time.

The Thread

As much as possible I match the colour of the thread to the colour of the bead.  Usually, I already have the colour of thread because I'm replacing the French knots in the pattern.  Where I can I use beads already in my stash because a) that way I'm not spending more money and b) my supply shops in town are limited (ie non existant) so I have to wait for the mail!  One easy way to match would be to take your threads with you when shopping or use this conversion chart I found while searching the net.


The Frame


I tend to place my frame on upside down when beading.  This means that any stray beads will be caught by the sides of the frame rather than slide off into the carpet or hidden depths of the chair.


Storing the Beads

Storing the beads while stitching is often the most tricky.  You can either leave them in their usual container and hope you don't send it flying, or you can place a few beads either onto a flat surface, into your upside down frame, or on the lid of an empty container.  Anything that is relatively flat so you can access the beads, but has sides to keep them from rolling away.

Starting off


If I am backstitching while beading, I will complete a few back stitches before adding the beads.  However, if I am just adding beads I will weave the thread through some already-finished stitches to anchor it in place.


Adding the Bead

Most often, beads (or French knots) are positioned in the corner of another stitch.  Push your needle up through the corner, add the bead, and then thread it back down through the same hole.  I like to try and keep my beads standing upright, although they have a habit of laying flat when I iron and frame the finished pattern.

Occasionally, the French knot in the pattern will take the place of a whole stitch.  I have mostly only come across this on printed cross stitch designs.  In this instance, I would come up from the bottom left corner and down through the top right corner as if completing the bottom half of a cross.


In actual fact, beading is really simple and straight forward - providing you don't send your container of beads flying!  Have fun and let me know how you get on.

Happy Stitching (and beading!)

Tuesday, 24 June 2014

Stitching in flight - Tips for successful in-flight cross stitching


Queensland school holidays begin at the end of this week - a time of travel, relaxation and a chance to catch up on stitching projects. I am having a week off these holidays (public servants do not get the full school holidays) and am going to Brisbane for a few days- a journey that (this time) will involve 1 1/2 hours in a plane and 10 hours in a car. Perfect stitching time!


Stitching while travelling takes a bit of preparation but I find it the perfect time to catch up on my stitching- what else is there to do while sitting in an airport, on a plane, or in a car (providing you aren't driving of course!!). As I plan my holiday stitching I thought I'd share my preparations:

1. The project itself - this will often depend on what I'm currently in the middle of, however smaller is always better!  Takes up less room in the suitcase, plus it's easier to manage in the car or on the plane :).  My favourite travel material these days is plastic canvas because it doesn't need a frame.  I've got a couple of projects on the go at the moment, but I'm going to be taking my newest pattern in order to finish the test stitch.  It measures 30 by 30, but doesn't have too many colours and fits nicely in a smaller frame.


2. The pattern - I tend to find it a good idea to only take a photocopy of your pattern with you, rather than the original.  That way if you spill your drink on your pattern or lose it in transit, you will still have your original waiting safely for you when you return.  These days, with the wonders of technology I no longer have to take a paper copy with me - my patterns are either PDFs saved on my iPad or computer, or photographs/scans of the originals.  Even more space saved :)
I think I've got the "spare needles"
 point covered


3. Extra needles - so very important!  Invariably if I forget to pack extras I will loose my needle within the first half hour.  Guaranteed.  I have a cute little tin that came free with a magazine that has a magnetic strip in the lid - very useful for keeping your needles organised (or at least together!)


QSnap Frame


4. Frame - unless I'm using plastic canvas or the project is minuscule, I never stitch without a fame.  The loss of tension frustrates me and I find I get too many knots.  I love my frames.  I have a couple of smaller hoops that are not only suitable for smaller projects, but perfect travel size.  However these days I prefer to use the plastic snap frames than hoops, and during my visit to the craft fair in March, I picked up a lovely small one (6") that fits nicely in my travel pack.


The Clover Thread Cutter Pendant


5. Thread cutter - with airport rules what they are these days you have to be so careful about scissors.  The last thing you want to do is loose your good pair at airport security!  One of my best travel investments years ago was the Clover Thread Cutter Pendant.  Worth its weight (which isn't much) in gold.  It's airport safe and can be worn on a chain around your neck (although the small opening means you need to be selective about which necklace you use!).


Triumph LED light


6. Light - another recent purchase at the craft fair was a small LED clip-on light.  Originally designed/marketed for reading, I find it the perfect travel size for stitching in the car and plane.  Now I have excellent light throughout the flight, even when they dim the cabin lights and without disturbing my fellow passengers, plus I don't lose valuable stitching time in the car after the sun goes down.


7. Carrying bag/box - last but certainly not least is the all important carrying box.  For many years I used a soft calico bag to keep my stitching supplies together while on holidays, which worked well, although didn't always keep the sand and dirt out, and wouldn't keep everything dry if it was dropped in water or had a drink spilled on it.  I've recently invested in some small plastic storage boxes to keep my WIPs in, and they are perfect for travelling.  The small 500ml and 1 litre sizes are great for stitching projects - everything folds up neat and tidy.  Best of all, they are dirt and water proof, and fit perfectly in my handbag for carry-on luggage.  The light won't fit inside, but that can go separately in my handbag.


8. A couple of other items - these aren't essentials, however can be useful depending on the project
Mini Highlighter - to help keep my place on my cross stitch pattern.  This is becoming less and less of a useful item as I move to PDF and scanned patterns on the iPad, but is still very valuable for the good old paper copies.
Thread Heaven - to keep my metallic threads in a usable condition.  And it comes in a lovely travel sized box.


Now that all the important packing is done, I suppose I should start on the rest of it.  You know, clothes and stuff.

I'd love to hear your stitchy travelling tips.

Happy stitching!!