Friday, 30 January 2015

New Stitching Companions

My life has change a bit over the last few months.  In October I bought a house.  The first time living in my own place, which meant that for the first time since I was a child I was able to get a pet bigger than a goldfish.  So, in November I adopted a cat.
Eevee
This is Eevee. I'm not entirely sure of her background as I adopted her through our local Pet Rescue.  They take pets from the pound, foster them, and try to find new homes for them.  Eevee was 9 months old when I adopted her and was originally called Evie.  I couldn't handle that (too boring) so changed the spelling.  Eevee is one of my favourite Pokemon so it worked out well.
Some of Eevee's favourite pastimes 
She's a bit shy with new people and doesn't really like being picked up but is very chatty, loves a scratch behind her ears and her favourite toy is a long yellow ribbon that came off a Christmas present.

However... I was worried she was lonely.  I work full time, and can be pretty busy on the weekends (or just wanting to sit and sew) so thought Eevee needed some company.

Enter Skimbles. Short for Skimbleshanks.  As in the railway cat in "Cats". (T.S. Elliott/Andrew Lloyd Webber).
Skimbles
A cat belonging to friends of mine had a litter of kittens which they were trying to adopt out.  I ummed and ahhed about it for a week or two before saying I would take one of them.  He was so cute I couldn't resist and so mid December 7-week-old Skimbles joined the family.
Skimbles in action
There's been some debate about Skimbles' sex.  My friends told me the cat was a he, I took it to the vet for his first lot of vaccinations and the vet said it was a she.  Then I wasn't so sure as it seemed the cat was developing some genitalia.  At his second round of vaccinations earlier this week the vet confirmed it - Skimbles is male. Good thing the name is pretty unisex.  I wasn't fazed either way - my only thought when I was told Skimbles was a girl was "darn, she'll be more expensive to desex" and when we went back to male was "oh good, that will save me a bit of money."

In my experience cats are notoriously hard to sex.  When I was 13 I got a little black female kitten called Zanzibar and my younger brother got a tabby male kitten called Tiger.  Only it turned out Zanzibar was a boy and Tiger was a girl.  Again, good thing the names were unisex and that we weren't too worried about the sex.
My fur babies
Back to my fur babies.  I was a little concerned when I got Skimbles that Eevee wouldn't accept him.  Eevee spent the first couple of days hissing at Skimbles and swiping at him, and I had to feed them in separate rooms because they wouldn't eat if the other was around.  However after a few days I spied Eevee licking Skimbles and I knew it would all sort out.  Within a week their food bowls were next to each other and they would occasionally curl up on the couch together.  Now they are fine, except when Skimbles wants to play and Eevee doesn't but that's younger brothers for you!
Eevee guarding us from Sadie the robo cleaner
 Eevee likes being high - I found her on the shower screen one morning! She likes sleeping in the sink, and sitting on any windowsill.  She has a particular mew that means "I've found my ribbon and want to play" and will take off around the house at a moments notice to find it.  Her other favourite toy is the squeegee I clean the shower screen with although she's never managed to catch it.  Eevee is much more affectionate since Skimbles arrived and will willingly talk to visitors, particularly if they are giving Skimbles attention.

Skimbles is a kitten so wants to play.  He likes to sit wherever Eevee is, his favourite toy is whatever Eevee is playing with, his second favourite toy is Eevee's tail, and his favourite game is 'chase Eevee around the house' (typical younger brother). He has a funny chirpy mew that doesn't sound like a mew.  Skimbles has recently developed a habit of sleeping on top of me or right next to my head and will bat my eye/ear/nose if he thinks I need to be awake.

They both have to be in whatever room I am in, including the bathroom, and will sit by the shower wondering why on earth I enjoy the water.  When they're on my bed they have to sleep touching me and get distressed if I move.  Thankfully they also both love their scratching posts, although they also like my furniture.  We're getting there.
Helping me stitch
And I love them.  Even if they make a mess, knock things off benches, and have put holes in my new furniture.

Do you have a stitching companion or two?  I'd love to hear about them.

Happy Stitching!

Wednesday, 28 January 2015

How To Cross Stitch - The Backstitch

The Ultimate How To Cross Stitch Guide - Post 4 is about the backstitch.


The Backstitch

Backstitch is the outlining.  It adds definition to your stitching, gives shape, and can draw attention to particular aspects.  Some people hate backstitch or find it tedious, but I enjoy it - I love seeing a project tie together and those weird vague shapes get a form and function.  Backstitch is also the easiest stitch - it's just creating lines.
The difference backstitch makes to a picture
The design is from World of Cross Stitch magazine
Backstitching should be left until all your other stitches are completed.  This will allow it to stand out by sitting over your other stitches.  Push your needle up at one, and then down at two.  Work your way around your design.  Backstitch lines can be straight, diagonal, or cross multiple squares.


Some designs are made up entirely of backstitch, specifically blackwork or designs featuring quotes.

This design, from the World of Cross Stitch magazine is
predominately made up of backstitch, with only a few
crosses and beads.
Coming up...

Next post will be about half-stitch, which to me is the last of the three main stitches in cross stitch.

Happy stitching!

Sunday, 25 January 2015

How to Cross Stitch - the Cross Stitch

The Ultimate How To Cross Stitch Guide - Post 3 is all about the main, nay essential stitch involved in cross stitching.

The Cross Stitch

The main stitch in cross stitch is, funnily enough, the cross stitch.  It consists of two short stitches to make up the cross.  Aida is great material to stitch on because (as you can see below) the square are already present, making it easy to make your crosses.


To stitch a cross, you position your needle behind the fabric and come up at 1, then push it down at 2. Come up again at 3, and push it down again at 4 and, voilĂ , you have your cross.


Usually in cross stitch, you need to make a row of stitches.  Rather than stitching each cross individually (which would be rather tedious and time consuming), you stitch a row of the bottom half, then come back along the row stitching the top half.


Then it's all just a matter of reading the pattern and counting, skipping over the blank squares or squares with other colours in them.  You may find it is helpful to use a highlighter to cross off the squares you've already stitched so you don't lose your place, particularly on larger or more complex designs.

Finishing off


To finish off your thread, weave the needle under five or six stitches to anchor it in place before cutting off the excess thread.  Alternatively, you can anchor it in place by your next five or six stitches, using the running start method from the previous post.


Coming Up...

Next post I'll show you backstitch, which is even simpler than the cross stitch.  In a future post  I'll also show you how to stitch on evenweave, which is my preferred fabric.

Happy Stitching!

Wednesday, 21 January 2015

How To Cross Stitch - Starting your thread


This is Post 2 of the Ultimate Cross Stitch How-To Guide - Securing your thread

When you begin learning how to cross stitch, one of the first things you need to know is how to start... as in how to secure your thread!  One of the biggest no-no's of cross stitch is using knots - these can cause bulges in your stitching (and make the back look ugly) and is generally frowned upon.  This is why starting cross stitch (and other hand embroidery) is very different to regular sewing.

There are two different methods to securing your thread when you start your stitching - the Running Start (also called the waste knot start) and the Loop Start.

The Loop Start


1. Separate one strand of thread

2. Fold it in half and thread the open ends through the eye of the needle

3. After stitching the first half of the first cross, turn your material over.  Push your needle through the loop at the end of your thread.

4.  Tighten the thread gently so that it looks like picture 4.  Turn your material back right-side-up and continue stitching.


The Running Start

1. Remove two strands of thread 

2. Thread them through the eye of the needle.

3. After stitching the first half of the first cross, turn your material over.  Hold the loose ends in position with your thumb.  Push your needle back through the fabric, taking care to ensure that the loose ends are trapped under the thread.

4.  Continue stitching, ensuring that the loose end is caught or 'trapped' by your crosses.  Four or five stitches should secure it in place.

This method is also sometimes known as the waste knot start as some people knot the end of their thread to help secure it under the four or five stitches, and then snip the knot off.  I have only ever done this with metallics, but each to their own.

 Loop Start or Running Start?

I prefer to use the loop start as it keeps the back of my stitching looking neater (I'm a bit of a snob like that!).  Of course, sometimes there is no choice but to use the running start: 
  • when you are using only one strand (such as backstitch)
  • when you are using left-over lengths of thread or short lengths from kits 
  • when you are using metallics and want to secure them to your needle
At the end of the day the choice is yours - use whatever you feel most comfortable with.

Coming Up....
Next post I will show you how to complete the most basic cross stitch stitch - the cross.

Happy Stitching!


Sunday, 18 January 2015

How to Cross Stitch - The Essential Materials

Cross stitching has long been my favourite hobby- I love how relaxing it is, how I can tune out the world around me, and I especially love sharing my hobby with others.   It is a very simple skill to pick up, as my 27 year old brother demonstrated last week when he stitched his first ever piece as a present for his girlfriend.
My brother's first stitching project.
Pattern is from a World Of Cross Stitch magazine
Several people have recently asked me via Etsy how difficult it is to learn how to stitch and so I thought I would put together a bit of a "how to" guide.

As I started putting this blog post together, it became bigger than Ben Hurr, so I decided to break it down into different posts.  As I write each one, I'll update the links here:
- The essential materials
- Starting Off
- The Cross Stitch
- The Back Stitch
- The Half Stitch
- The French Knot
- Beading (from last week)
- Stitching on Evenweave

This week is
The Essential Materials

The Thread

Cross stitch thread comes in bundles known as skeins.  It is a long length of thread, made up of 6 individual strands.  Most stitches require either one or two strands of thread to work the design.  Two threads gives a thicker appearance and covers the fabric better.  One strand tends to be used for backstitch.  I store my threads on bobbins to keep them organised so I can find the desired number quickly, and to stop them becoming tangled.


There are many different brands of cross stitch thread, however the main ones are DMC and Anchor.  I tend to use DMC as that is what my mother was collecting when I inherited her stash


To start stitching, unwind the desired length of thread from the skein or bobbin and cut it off.  I like to have a length about as long as my arm so that I don't have to come back for more as often.  However, shorter lengths do not become as tangled.  If you are new to cross stitch, a length approximately 20 to 30 cm is a good place to start.
The Fabric

There are many different types of cross stitch fabric around - aida, cotton evenweave, linen, zweigart linda, hardanger, crewel, plastic canvas, stitching paper... the list is endless.  They come in a multitude of colours and sizes and everyone has their own preference.  There is a great description on some of the different types of fabrics here.

The main types I use are aida and evenweave.

Aida is woven into blocks, which creates squares for you to stitch over.  Because it is so easy to see the squares, it is an ideal fabric for the beginner stitcher.  It comes in different sizes - 6, 8, 10, 12, 14, 16, 18.  These sizes relate to the number of squares per inch - the bigger the number, the smaller the squares on the fabric.

 Evenweave contains lots of strands of flax.  It tends to be more uneven than aida.  The holes in the fabric are smaller, and stitches are made over two strands or holes rather than one. Evenweave sizes (22, 24, 26, 28, 32 holes per inch) tend to be double that of aida - for example 14 count aida is approximate to 28 count evenweave.

The Needles

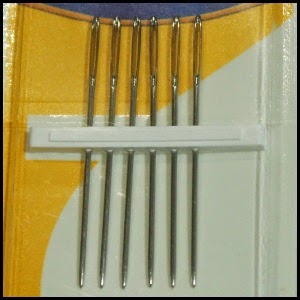
Needles used in embroidery are blunter than those used for general sewing.  Because the holes are already present in the fabric, you don't need a very sharp needle to push through.  Tapestry needles also have large eyes, which makes it easier to thread them.  Needles come in a variety of sizes depending on how thick they are.  The larger count fabric you are using (remember - smaller holes), the thinner needle you should use so you don't stretch out your fabric.  I came across a really handy guide here that discusses the correlation of needle and fabric size for cross stitching.


The Scissors


It is important to have a sharp pair of embroidery scissors when stitching.  And that they aren't used for anything other than cutting threads or fabric!  Paper will blunt your scissors pretty quickly.


The Hoop


I find it essential when stitching to use a hoop or frame.  This helps keep the fabric taught which means that your stitches are more even.  It also gives you something to hold on to rather than your fabric, reducing the stains caused by the oils in your sweat and any dirt on your fingers.

My favourite frame at the moment is the Q-Snap frame.  It comes in a range of sizes that can be joined together to create even more sizes and shapes, and doesn't squish my stitches as much as a hoop does.

The Measuring Tape


Essential for measuring out your fabric prior to using it - so that you know you have enough before you start stitching.

(Plus he's just so cute I had to include him!)


Coming up...


Over the next few weeks, I will show you some the main stitches involved in cross stitch, including the cross, the backstitch, the half stitch, and the dreaded french knot.  I'll also show you how to stitch on evenweave, which is my preferred stitching fabric.

Happy Stitching!