Friday 30 January 2015

New Stitching Companions

My life has change a bit over the last few months.  In October I bought a house.  The first time living in my own place, which meant that for the first time since I was a child I was able to get a pet bigger than a goldfish.  So, in November I adopted a cat.
Eevee
This is Eevee. I'm not entirely sure of her background as I adopted her through our local Pet Rescue.  They take pets from the pound, foster them, and try to find new homes for them.  Eevee was 9 months old when I adopted her and was originally called Evie.  I couldn't handle that (too boring) so changed the spelling.  Eevee is one of my favourite Pokemon so it worked out well.
Some of Eevee's favourite pastimes 
She's a bit shy with new people and doesn't really like being picked up but is very chatty, loves a scratch behind her ears and her favourite toy is a long yellow ribbon that came off a Christmas present.

However... I was worried she was lonely.  I work full time, and can be pretty busy on the weekends (or just wanting to sit and sew) so thought Eevee needed some company.

Enter Skimbles. Short for Skimbleshanks.  As in the railway cat in "Cats". (T.S. Elliott/Andrew Lloyd Webber).
Skimbles
A cat belonging to friends of mine had a litter of kittens which they were trying to adopt out.  I ummed and ahhed about it for a week or two before saying I would take one of them.  He was so cute I couldn't resist and so mid December 7-week-old Skimbles joined the family.
Skimbles in action
There's been some debate about Skimbles' sex.  My friends told me the cat was a he, I took it to the vet for his first lot of vaccinations and the vet said it was a she.  Then I wasn't so sure as it seemed the cat was developing some genitalia.  At his second round of vaccinations earlier this week the vet confirmed it - Skimbles is male. Good thing the name is pretty unisex.  I wasn't fazed either way - my only thought when I was told Skimbles was a girl was "darn, she'll be more expensive to desex" and when we went back to male was "oh good, that will save me a bit of money."

In my experience cats are notoriously hard to sex.  When I was 13 I got a little black female kitten called Zanzibar and my younger brother got a tabby male kitten called Tiger.  Only it turned out Zanzibar was a boy and Tiger was a girl.  Again, good thing the names were unisex and that we weren't too worried about the sex.
My fur babies
Back to my fur babies.  I was a little concerned when I got Skimbles that Eevee wouldn't accept him.  Eevee spent the first couple of days hissing at Skimbles and swiping at him, and I had to feed them in separate rooms because they wouldn't eat if the other was around.  However after a few days I spied Eevee licking Skimbles and I knew it would all sort out.  Within a week their food bowls were next to each other and they would occasionally curl up on the couch together.  Now they are fine, except when Skimbles wants to play and Eevee doesn't but that's younger brothers for you!
Eevee guarding us from Sadie the robo cleaner
 Eevee likes being high - I found her on the shower screen one morning! She likes sleeping in the sink, and sitting on any windowsill.  She has a particular mew that means "I've found my ribbon and want to play" and will take off around the house at a moments notice to find it.  Her other favourite toy is the squeegee I clean the shower screen with although she's never managed to catch it.  Eevee is much more affectionate since Skimbles arrived and will willingly talk to visitors, particularly if they are giving Skimbles attention.

Skimbles is a kitten so wants to play.  He likes to sit wherever Eevee is, his favourite toy is whatever Eevee is playing with, his second favourite toy is Eevee's tail, and his favourite game is 'chase Eevee around the house' (typical younger brother). He has a funny chirpy mew that doesn't sound like a mew.  Skimbles has recently developed a habit of sleeping on top of me or right next to my head and will bat my eye/ear/nose if he thinks I need to be awake.

They both have to be in whatever room I am in, including the bathroom, and will sit by the shower wondering why on earth I enjoy the water.  When they're on my bed they have to sleep touching me and get distressed if I move.  Thankfully they also both love their scratching posts, although they also like my furniture.  We're getting there.
Helping me stitch
And I love them.  Even if they make a mess, knock things off benches, and have put holes in my new furniture.

Do you have a stitching companion or two?  I'd love to hear about them.

Happy Stitching!

Wednesday 28 January 2015

How To Cross Stitch - The Backstitch

The Ultimate How To Cross Stitch Guide - Post 4 is about the backstitch.


The Backstitch

Backstitch is the outlining.  It adds definition to your stitching, gives shape, and can draw attention to particular aspects.  Some people hate backstitch or find it tedious, but I enjoy it - I love seeing a project tie together and those weird vague shapes get a form and function.  Backstitch is also the easiest stitch - it's just creating lines.
The difference backstitch makes to a picture
The design is from World of Cross Stitch magazine
Backstitching should be left until all your other stitches are completed.  This will allow it to stand out by sitting over your other stitches.  Push your needle up at one, and then down at two.  Work your way around your design.  Backstitch lines can be straight, diagonal, or cross multiple squares.


Some designs are made up entirely of backstitch, specifically blackwork or designs featuring quotes.

This design, from the World of Cross Stitch magazine is
predominately made up of backstitch, with only a few
crosses and beads.
Coming up...

Next post will be about half-stitch, which to me is the last of the three main stitches in cross stitch.

Happy stitching!

Sunday 25 January 2015

How to Cross Stitch - the Cross Stitch

The Ultimate How To Cross Stitch Guide - Post 3 is all about the main, nay essential stitch involved in cross stitching.

The Cross Stitch

The main stitch in cross stitch is, funnily enough, the cross stitch.  It consists of two short stitches to make up the cross.  Aida is great material to stitch on because (as you can see below) the square are already present, making it easy to make your crosses.


To stitch a cross, you position your needle behind the fabric and come up at 1, then push it down at 2. Come up again at 3, and push it down again at 4 and, voilĂ , you have your cross.


Usually in cross stitch, you need to make a row of stitches.  Rather than stitching each cross individually (which would be rather tedious and time consuming), you stitch a row of the bottom half, then come back along the row stitching the top half.


Then it's all just a matter of reading the pattern and counting, skipping over the blank squares or squares with other colours in them.  You may find it is helpful to use a highlighter to cross off the squares you've already stitched so you don't lose your place, particularly on larger or more complex designs.

Finishing off


To finish off your thread, weave the needle under five or six stitches to anchor it in place before cutting off the excess thread.  Alternatively, you can anchor it in place by your next five or six stitches, using the running start method from the previous post.


Coming Up...

Next post I'll show you backstitch, which is even simpler than the cross stitch.  In a future post  I'll also show you how to stitch on evenweave, which is my preferred fabric.

Happy Stitching!

Wednesday 21 January 2015

How To Cross Stitch - Starting your thread


This is Post 2 of the Ultimate Cross Stitch How-To Guide - Securing your thread

When you begin learning how to cross stitch, one of the first things you need to know is how to start... as in how to secure your thread!  One of the biggest no-no's of cross stitch is using knots - these can cause bulges in your stitching (and make the back look ugly) and is generally frowned upon.  This is why starting cross stitch (and other hand embroidery) is very different to regular sewing.

There are two different methods to securing your thread when you start your stitching - the Running Start (also called the waste knot start) and the Loop Start.

The Loop Start


1. Separate one strand of thread

2. Fold it in half and thread the open ends through the eye of the needle

3. After stitching the first half of the first cross, turn your material over.  Push your needle through the loop at the end of your thread.

4.  Tighten the thread gently so that it looks like picture 4.  Turn your material back right-side-up and continue stitching.


The Running Start

1. Remove two strands of thread 

2. Thread them through the eye of the needle.

3. After stitching the first half of the first cross, turn your material over.  Hold the loose ends in position with your thumb.  Push your needle back through the fabric, taking care to ensure that the loose ends are trapped under the thread.

4.  Continue stitching, ensuring that the loose end is caught or 'trapped' by your crosses.  Four or five stitches should secure it in place.

This method is also sometimes known as the waste knot start as some people knot the end of their thread to help secure it under the four or five stitches, and then snip the knot off.  I have only ever done this with metallics, but each to their own.

 Loop Start or Running Start?

I prefer to use the loop start as it keeps the back of my stitching looking neater (I'm a bit of a snob like that!).  Of course, sometimes there is no choice but to use the running start: 
  • when you are using only one strand (such as backstitch)
  • when you are using left-over lengths of thread or short lengths from kits 
  • when you are using metallics and want to secure them to your needle
At the end of the day the choice is yours - use whatever you feel most comfortable with.

Coming Up....
Next post I will show you how to complete the most basic cross stitch stitch - the cross.

Happy Stitching!


Sunday 18 January 2015

How to Cross Stitch - The Essential Materials

Cross stitching has long been my favourite hobby- I love how relaxing it is, how I can tune out the world around me, and I especially love sharing my hobby with others.   It is a very simple skill to pick up, as my 27 year old brother demonstrated last week when he stitched his first ever piece as a present for his girlfriend.
My brother's first stitching project.
Pattern is from a World Of Cross Stitch magazine
Several people have recently asked me via Etsy how difficult it is to learn how to stitch and so I thought I would put together a bit of a "how to" guide.

As I started putting this blog post together, it became bigger than Ben Hurr, so I decided to break it down into different posts.  As I write each one, I'll update the links here:
- The essential materials
- Starting Off
- The Cross Stitch
- The Back Stitch
- The Half Stitch
- The French Knot
- Beading (from last week)
- Stitching on Evenweave

This week is
The Essential Materials

The Thread

Cross stitch thread comes in bundles known as skeins.  It is a long length of thread, made up of 6 individual strands.  Most stitches require either one or two strands of thread to work the design.  Two threads gives a thicker appearance and covers the fabric better.  One strand tends to be used for backstitch.  I store my threads on bobbins to keep them organised so I can find the desired number quickly, and to stop them becoming tangled.


There are many different brands of cross stitch thread, however the main ones are DMC and Anchor.  I tend to use DMC as that is what my mother was collecting when I inherited her stash


To start stitching, unwind the desired length of thread from the skein or bobbin and cut it off.  I like to have a length about as long as my arm so that I don't have to come back for more as often.  However, shorter lengths do not become as tangled.  If you are new to cross stitch, a length approximately 20 to 30 cm is a good place to start.
The Fabric

There are many different types of cross stitch fabric around - aida, cotton evenweave, linen, zweigart linda, hardanger, crewel, plastic canvas, stitching paper... the list is endless.  They come in a multitude of colours and sizes and everyone has their own preference.  There is a great description on some of the different types of fabrics here.

The main types I use are aida and evenweave.

Aida is woven into blocks, which creates squares for you to stitch over.  Because it is so easy to see the squares, it is an ideal fabric for the beginner stitcher.  It comes in different sizes - 6, 8, 10, 12, 14, 16, 18.  These sizes relate to the number of squares per inch - the bigger the number, the smaller the squares on the fabric.

 Evenweave contains lots of strands of flax.  It tends to be more uneven than aida.  The holes in the fabric are smaller, and stitches are made over two strands or holes rather than one. Evenweave sizes (22, 24, 26, 28, 32 holes per inch) tend to be double that of aida - for example 14 count aida is approximate to 28 count evenweave.

The Needles

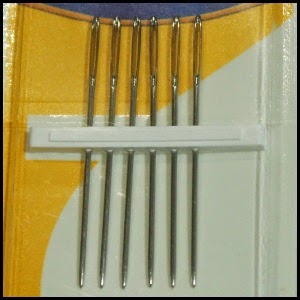
Needles used in embroidery are blunter than those used for general sewing.  Because the holes are already present in the fabric, you don't need a very sharp needle to push through.  Tapestry needles also have large eyes, which makes it easier to thread them.  Needles come in a variety of sizes depending on how thick they are.  The larger count fabric you are using (remember - smaller holes), the thinner needle you should use so you don't stretch out your fabric.  I came across a really handy guide here that discusses the correlation of needle and fabric size for cross stitching.


The Scissors


It is important to have a sharp pair of embroidery scissors when stitching.  And that they aren't used for anything other than cutting threads or fabric!  Paper will blunt your scissors pretty quickly.


The Hoop


I find it essential when stitching to use a hoop or frame.  This helps keep the fabric taught which means that your stitches are more even.  It also gives you something to hold on to rather than your fabric, reducing the stains caused by the oils in your sweat and any dirt on your fingers.

My favourite frame at the moment is the Q-Snap frame.  It comes in a range of sizes that can be joined together to create even more sizes and shapes, and doesn't squish my stitches as much as a hoop does.

The Measuring Tape


Essential for measuring out your fabric prior to using it - so that you know you have enough before you start stitching.

(Plus he's just so cute I had to include him!)


Coming up...


Over the next few weeks, I will show you some the main stitches involved in cross stitch, including the cross, the backstitch, the half stitch, and the dreaded french knot.  I'll also show you how to stitch on evenweave, which is my preferred stitching fabric.

Happy Stitching!

Friday 16 January 2015

I'm a Marshmallow - It's a new pattern!

I admit it.  I'm a Marshmallow.  I've been one for years, since I saw my first episode.

Marshmallow is the term given to a fan of the awesome television show Veronica Mars and comes from a quote from the pilot episode "You're a Marshamallow, Veronica Mars." Veronica Mars met all my criteria for a good show while I was at Uni - there was a mystery element, there was sass, there was great script writing, there was intrigue.
Meeting some of the VM cast - Wallace, Sherif Lamb, and Logan
I was one of those who was upset when the show finished far too early (and other rubbish was kept on) and who wished there could be more.  It was my second Firefly in that respect.  When I heard they were campaigning to make a movie, at first I didn't believe it (too good to be true) and then I jumped on board to show my support, contributing to the now-famous Kickstarter campaign.  I waited eagerly for the movie, devouring each of Rob Thomas' email updates.  I loved the movie and have re-watched it several times since its release earlier in 2014.  Now I am eagerly waiting for the delivery of the second post-movie novel which I pre-ordered back in July (I received an email last night to say it's on its way - hurray!).

As I said, I'm a Marshmallow.

All of this (there was a point, really) brings me to the exciting news that this week's new pattern on Etsy is...
Available from my Etsy store
I had a lot of fun with this one, coming up with different characters, quotes and locations to fill the different letters.  As always, if your favourite is missing you can order a custom pattern instead.

A is for Aaron Echolls, Logan's actor father
B is for Backup, Veronica's faithful companion 
C is for Dick Casablancas, the class clown
D is for Duncan Kane, Veronica's first boyfriend
E is for Logan Echolls, Veronica's true love
F is for the theme song "We used to be Friends"
G is for Gia Goodman, classmate and daughter of Woody Goodman
H is for Neptune High, the main location for the first two seasons
I is for Mars Investigations, Keith's detective business
J is for Jackie, Wallace's girlfriend in season 2
K is for Keith Mars, everyone favourite father
L is for Lilly Kane, who's murder was the basis for season 1
M is for Mac, Veronica's only female friend
N is for Weevil Nevaro, head of the PCHers 
O is for a pilot quote "Be cool Soda Pop"
P is for the PCHers, Neptune's biker gang
Q is for Questions and Answers, the basis of any detective show
R is for Rob Thomas, the creator
S is for Sheriff Lamb, who we love to hate
T is for the eternal debate - are you Team Piz or Team Logan
U is for Undercover surveillance, what every detective must do
V is for Vinnie Van Lowe, Keith's not-really rival
W is for Wallace, Veronica's best friend and ally
X is for Felix Toombs, who died.
Y is for the ultimate quote "You're a marshmallow, Veronica Mars"
Z is for Piz, Veronica's season 3 boyfriend

Happy Stitching!

Tuesday 13 January 2015

How to... Beading

Last blog post I discussed the French Knot vs Beading debate.  It seems from the comments on Facebook, Instagram and here on the blog that there are a lot of other people who would rather bead than french knot.  As promised in the previous post, I am now going to share some of my tips for using beads in cross stitch.

The Needles

A standard cross stitch needle (size 24) is too large to bead with as the beads will not pass over the eye of the needle.  Instead, I tend to use either a beading needle or a smaller cross stitch needle - size 28 or smaller.

The beading needle is a long, thin, flexible needle which makes it very useful for passing through the beads and I'm yet to find a bead too small to fit it.  However, because it is so flexible, I find it too flimsy to stitch with.  This is why I tend to use a size 28 cross stitch needle.  The eye is small enough to fit most seed beads, and is sturdy enough for backstitch so I can combine the two to save time.

The Thread

As much as possible I match the colour of the thread to the colour of the bead.  Usually, I already have the colour of thread because I'm replacing the French knots in the pattern.  Where I can I use beads already in my stash because a) that way I'm not spending more money and b) my supply shops in town are limited (ie non existant) so I have to wait for the mail!  One easy way to match would be to take your threads with you when shopping or use this conversion chart I found while searching the net.


The Frame


I tend to place my frame on upside down when beading.  This means that any stray beads will be caught by the sides of the frame rather than slide off into the carpet or hidden depths of the chair.


Storing the Beads

Storing the beads while stitching is often the most tricky.  You can either leave them in their usual container and hope you don't send it flying, or you can place a few beads either onto a flat surface, into your upside down frame, or on the lid of an empty container.  Anything that is relatively flat so you can access the beads, but has sides to keep them from rolling away.

Starting off


If I am backstitching while beading, I will complete a few back stitches before adding the beads.  However, if I am just adding beads I will weave the thread through some already-finished stitches to anchor it in place.


Adding the Bead

Most often, beads (or French knots) are positioned in the corner of another stitch.  Push your needle up through the corner, add the bead, and then thread it back down through the same hole.  I like to try and keep my beads standing upright, although they have a habit of laying flat when I iron and frame the finished pattern.

Occasionally, the French knot in the pattern will take the place of a whole stitch.  I have mostly only come across this on printed cross stitch designs.  In this instance, I would come up from the bottom left corner and down through the top right corner as if completing the bottom half of a cross.


In actual fact, beading is really simple and straight forward - providing you don't send your container of beads flying!  Have fun and let me know how you get on.

Happy Stitching (and beading!)

Thursday 8 January 2015

Beads vs French knots


Are you a beader or a French knot fan?

One of the the most hated stitches in cross stitch is the French knot.  More so than back stitch, it's one of those things you either tolerate or hate.  And boy do most people hate it.  Have a look on any forum, magazine advice section, Facebook page or twitter feed and the French knot debate will be out in force.  

I'm yet to come across anyone who jumps up and down in joy squealing "ooh I love French knots" but I'm sure they're out there.  Strange unnatural fetishes are everywhere after all.

Personally, I hate them.  They're fiddly, they don't sit neatly, they're never of a uniform size, they untie at the drop of a hat or pull through the fabric and you find hours of work undone in an instant.
Pretty much the only time I use French knots is
to dot the i's and j's in writing.
Too bad they are such a useful stitch.  They're perfect for dotting the 'i' or adding punctuation to sentences and quotes.  They make quick and easy eyes and buttons.  They add a 3D effect and additional element to your picture.  I admit, I add them quite frequently in my patterns, particularly ones with writing.  

Which is why it is so great that there is a useful, quick, easy, simple alternative to the French knot:

The humble seed bead.

I think it was a store holder at a craft fair in Townsville some 10 or so years ago who first suggested to me using seed beads instead of French knots.  
The first time I used seed beads instead of French knots.
Angel of Dreams by Dimensions
The effect was instantaneous and amazing.  No more fiddling around trying to wrap the thread around my needle.  No more having to judge the exact right amount of tension to create the knot without pulling it through the fabric.  No more having to worry about the size of the knots. Amazing.

Okay, so you do have the added challenge of not tipping over the seed bead container, or losing your beads down the side of the couch or in the carpet.  But we wouldn't want it to be too easy now, would we?
This painted cross stitch pattern has far too many French knots
for comfort.  But never fear - I have my seed beads ready to go
I do still occasionally use French knots, particularly if there is only one or two in the pattern, or I don't have the appropriate colour on hand and don't want to wait for the postman (no local supplier in my country town!), but for the main part all my French knots are replaced with seed beads.  I'm slowly building up a collection of colours - they're so pretty!
My bead collection
If you have never replaced your French knots with seed beads, I highly recommend you give it a go.  You might be presently surprised.  In my next blog post I am going to give a bit of a step by step on using seed beads in cross stitch. 
One of my earliest beading attempts.  Not too bad, although
the thread one on the left needs to be tightened!
Or maybe you are that rare creature, the French Knot Fan.  If so, more power to you.  I bow to your talent and perseverance.  You have more patience than I do!

Happy Stitching!

Tuesday 6 January 2015

Temporary Suspension of Instant Downloads on Cross Stitch Patterns

This week I have been trying to get my head around International taxation laws.

On the 1st of January, I received an email from Etsy informing me that of the 1st of January 2015 (that's right - that day!) there would be significant changes to European Commission rules related to Value Added Tax on sales of digital goods.  Nothing like a little bit of warning or a heads up!

The email from Etsy informed me that:

"The new rules state that all businesses selling digital goods and delivering them electronically to consumers in European Union member countries will be required to pay VAT based on the VAT rates of the country where the customer is located, not on the rates of the country where the business is located.  If your shop is based outside of the EU, it is unclear how the VAT rules will be enforced."

"We're working on a tool that will make the process easier for you and give you the ability to verify the country of your buyers.  We'll be releasing further details in January 2015".

You know, after the new rules have come into place.

As far as I have been able to find out:
1) this rule covers the sales of digital patterns
2) each country in the EU has a different rate of VAT
3) currently there is no way to add VAT to sales, to identify where customers are from prior to purchase, or to limit sales to specific countries, which means that
4) currently if I have to pay VAT it comes out of my pocket, rather than being charged to the customer which is what is meant to happen

But most importantly:
5) The United Kingdom has taken the position that PDFs manually emailed by sellers are not covered by the new rules.

As a result, I have taken the position to temporarily remove all instant downloads from my Etsy store, and to instead email the patterns to customers.  It's a lot more work for me, and means that it will take a bit longer for you to receive your orders.  However, as the largest majority of my sales are in Australia, the USA and the UK, this is the easiest, cheapest way for me to abide by the new EU rules as an international seller.

This has all thrown me a bit and made me realise that I need to become more aware of the Australian taxation laws affecting Fangirl Stitches, and of the International taxation laws.  It's also meant that I've been more than a little distracted as far as cross stitching is concerned.  I have a number of new patterns that will be appearing in the Etsy store soon, and a new direction for Fangirl Stitches that I'm quite excited about, and I hope you will be too.  More on that soon, I promise!

Hopefully Etsy will come up with an alternative solution quickly and I will be able to revert back to Instant Downloads, which are everyone's friend.

Happy Stitching!

- Ros at Fangirl Stitches